You know that moment when you’re scrolling through recipe videos at 11 PM and suddenly you NEED chocolate bread? That was me about three years ago, except I got obsessed with making the perfect chocolate rolls. I must have tested this recipe at least 15 times before I got it exactly right, and honestly, my family wasn’t complaining about being my taste testers.
Here’s what I learned: most chocolate roll recipes are either too dry, not chocolatey enough, or they require a KitchenAid stand mixer and three hours of your life. I wanted something that actually delivers on the “double chocolate” promise without turning your kitchen into a disaster zone. These rolls are soft, intensely chocolatey, and surprisingly forgiving for a yeast-based recipe.
Essential Ingredients
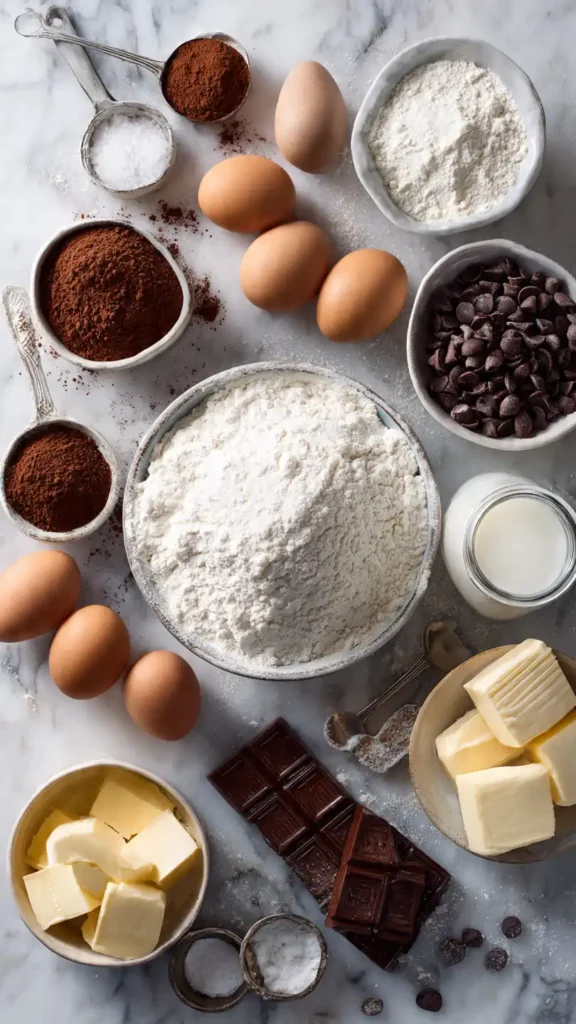
- 3 ½ cups all-purpose flour
- ¼ cup unsweetened cocoa powder
- ¼ cup granulated sugar
- 1 packet (2 ¼ tsp) instant yeast
- 1 tsp salt
- 1 cup whole milk, warmed (110°F)
- ¼ cup unsalted butter, melted
- 2 large eggs, room temperature
- 1 tsp vanilla extract
For the Filling:
- ⅓ cup unsalted butter, softened
- ½ cup packed brown sugar
- 3 tbsp unsweetened cocoa powder
- 1 cup semi-sweet chocolate chips
For the Chocolate Glaze:
- 1 cup powdered sugar
- 3 tbsp unsweetened cocoa powder
- 3-4 tbsp whole milk
- ½ tsp vanilla extract
Alternative Ingredients
Look, I get it. Sometimes you don’t have every single ingredient on hand, and that’s totally fine. Let me share what actually works as substitutions because I’ve tried most of them.
Flour: You can use bread flour instead of all-purpose if you want slightly chewier rolls. I’ve done it both ways and honestly prefer all-purpose for a softer texture.
Milk: Any milk works here. I’ve used 2%, almond milk, and even oat milk when I ran out. Just make sure it’s warm but not hot, or you’ll kill the yeast (learned that the hard way).
Butter: You could use coconut oil in a pinch, though the flavor will be slightly different. For the filling, cream cheese actually works surprisingly well if you’re out of butter.
Chocolate Chips: Feel free to use dark chocolate chips, milk chocolate chips, or even chopped chocolate bars. I’ve tried it with a mix of semi-sweet and white chocolate chips, which my kids loved.
Brown Sugar: White sugar works if that’s all you have. The brown sugar just adds a deeper, more caramel-like flavor to the filling.
Step-by-Step Directions
Prepare the Dough (15 minutes): Start by whisking together your flour, cocoa powder, sugar, yeast, and salt in a large mixing bowl. If you have a stand mixer with a dough hook, this is where it really shines, but you can absolutely do this by hand. I did it manually for the first year before I finally invested in a good mixer.
Make a well in the center of your dry ingredients. Pour in the warm milk, melted butter, eggs, and vanilla. Mix everything together until a shaggy dough forms. This takes about 2-3 minutes with a mixer or 5-6 minutes by hand.
Knead the Dough (8-10 minutes): If you’re using a stand mixer, knead on medium speed for about 8 minutes. The dough should pull away from the sides of the bowl and feel smooth and elastic. By hand, turn the dough onto a lightly floured surface and knead until smooth. Your arms will get a workout, but it’s actually pretty therapeutic.
First Rise (1 hour): Place the dough in a greased bowl, turning once to coat all sides. Cover with a clean kitchen towel or plastic wrap. Let it rise in a warm spot until doubled in size, about 60-75 minutes. I usually set mine on top of my dryer during a cycle, or you can use your oven’s proof setting if it has one.
Prepare the Filling (5 minutes): While the dough is rising, mix the softened butter, brown sugar, and cocoa powder in a small bowl until you get a spreadable paste. This is where a food processor makes life easier, but a fork and some elbow grease works just fine.
Roll and Fill (10 minutes): Once your dough has doubled, punch it down (so satisfying) and turn it out onto a lightly floured surface. Roll it into a 16×12 inch rectangle. Spread the chocolate filling evenly over the dough, leaving about a half-inch border on one long side. Sprinkle the chocolate chips all over the filling.
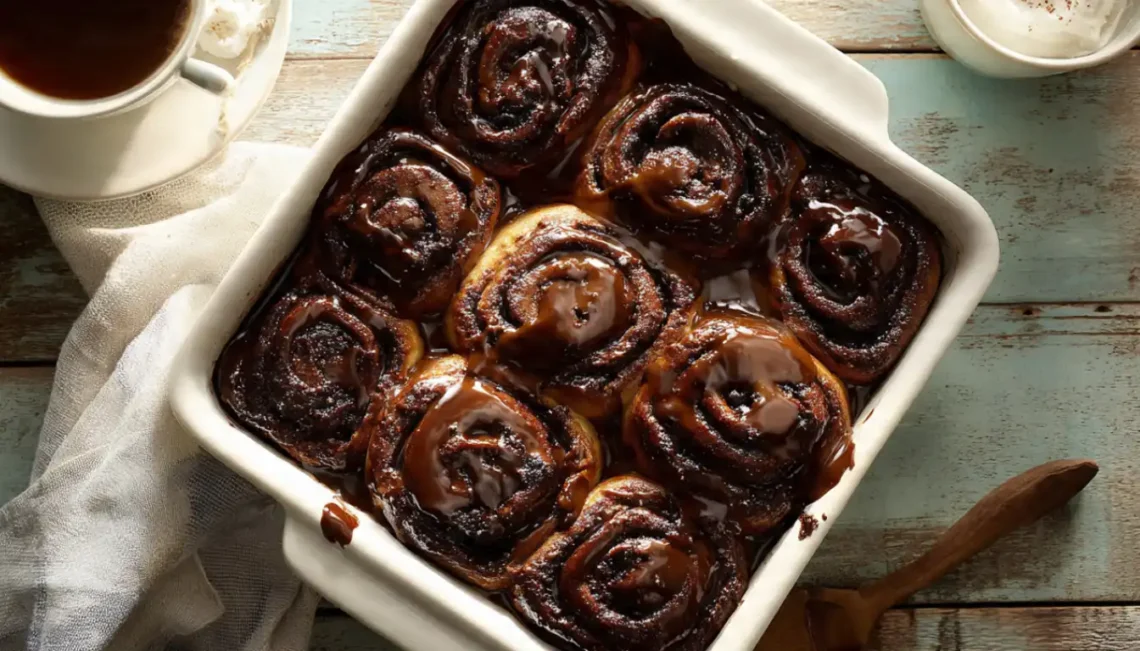
Starting from the long side opposite the border, roll the dough up tightly. When you get to the end, pinch the seam to seal. Use unflavored dental floss or a sharp knife to cut the log into 12 equal pieces. I prefer dental floss because it doesn’t squish the rolls.
Second Rise (30-45 minutes): Arrange the rolls in a greased 9×13 inch baking pan, leaving a little space between each one. Cover and let them rise until puffy, about 30-45 minutes. They should look noticeably bigger and spring back slowly when you poke them.
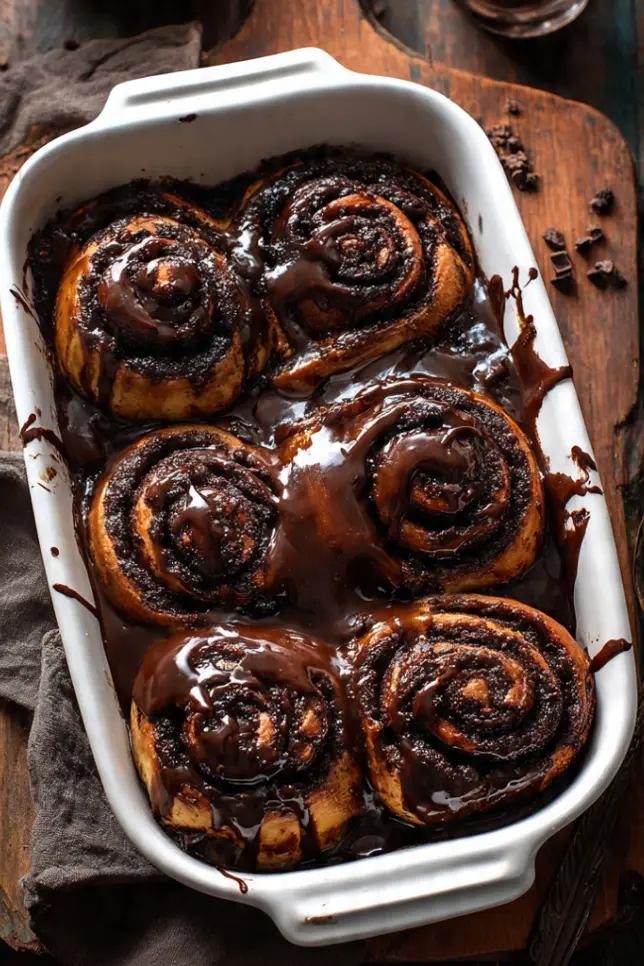
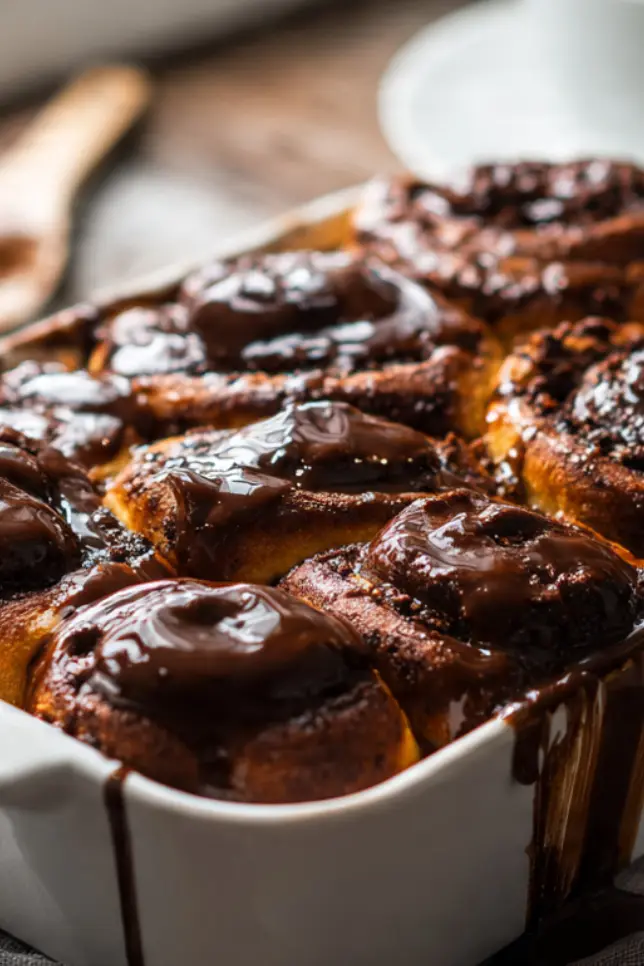
Bake (25-30 minutes): Preheat your oven to 350°F. Bake the rolls for 25-30 minutes until they’re set and a toothpick inserted into the center comes out mostly clean. You’ll still see some melted chocolate, which is exactly what you want.
Make the Glaze and Finish: While the rolls cool slightly, whisk together the powdered sugar, cocoa powder, milk, and vanilla until smooth. Start with 3 tablespoons of milk and add more if needed. Drizzle generously over the warm rolls.
Pro Tips
Let me share some hard-won wisdom from my many attempts at perfecting these rolls.
Temperature Matters: Your milk should be warm to the touch but not hot. I use an instant-read thermometer to hit 110°F exactly. Too hot kills the yeast, too cold and your dough takes forever to rise.
Don’t Skip the Second Rise: I know it’s tempting to rush this step, especially when you can smell chocolate baking, but that second rise is what makes these rolls impossibly soft and fluffy.
The Dental Floss Trick: Seriously, use dental floss to cut the rolls. Slide it under the log, cross the ends over the top, and pull tight. Clean cuts every single time without squishing your beautiful swirls.
Make-Ahead Option: You can prepare these the night before. After cutting the rolls and placing them in the pan, cover tightly and refrigerate overnight. In the morning, let them sit at room temperature for 30 minutes while your oven preheats, then bake as directed.
Storage Strategy: These keep well in an airtight container or meal prep containers for up to 3 days at room temperature, or you can freeze them for up to 3 months. I like to wrap individual rolls in plastic wrap before freezing for easy grab-and-go treats.
Level Up Your Glaze: Add a tablespoon of brewed coffee to your chocolate glaze. Trust me on this. It intensifies the chocolate flavor without making the glaze taste like coffee.
Frequently Asked Questions
Can I make double chocolate rolls ahead of time?
Yes. Prepare them the night before and bake fresh in the morning.
Why didn’t my dough rise?
Most likely the yeast was inactive or the milk was too hot.
Can I freeze them?
Yes, freeze for up to 3 months and reheat before eating.
Can I use active dry yeast?
Yes, just proof it first before mixing.
How do I keep them soft?
Store airtight and warm slightly before serving.
Why You’ll Love This Recipe
These aren’t your average cinnamon rolls with a chocolate twist. They’re deeply, seriously chocolatey from the dough to the filling to the glaze. Every bite hits you with layers of chocolate flavor, and the texture is incredibly soft and pillowy.
I love that these work for both breakfast (yes, chocolate for breakfast is acceptable in my house) and dessert. They’re fancy enough to serve at a brunch party but easy enough to make on a lazy Sunday morning. Plus, the smell of chocolate rolls baking is basically the best home fragrance you can get.
The best part? They’re actually easier than traditional cinnamon rolls because you don’t have to worry as much about achieving perfect cinnamon swirls. Chocolate is forgiving and delicious even when things aren’t picture-perfect.
What Makes This Recipe Unique
Most chocolate roll recipes out there are just cinnamon roll recipes with cocoa powder thrown into the filling. This recipe incorporates chocolate into the dough itself, creating a richer, more complex flavor profile. You’re getting chocolate in three distinct forms: cocoa in the dough, cocoa and butter in the filling, and melted chocolate chips throughout.
I also worked really hard to get the sweetness level right. A lot of chocolate bread recipes are either too sweet or not sweet enough. These hit that perfect balance where you can taste the chocolate without feeling like you just ate a candy bar for breakfast.
The addition of chocolate chips in the filling creates these amazing little pockets of melted chocolate throughout the rolls. It’s like finding buried treasure in every bite.
Key Features
Deeply Chocolatey: Chocolate in every component, from dough to filling to glaze.
Soft and Fluffy: The texture rivals any bakery cinnamon roll.
Make-Ahead Friendly: Prepare the night before and bake fresh in the morning.
Freezer-Friendly: Stock your freezer for quick chocolate fixes.
No Special Equipment Required: Though a stand mixer makes life easier, you can make these by hand.
Perfect for Sharing: Makes 12 generous rolls, ideal for family breakfasts or brunch gatherings.
Customizable: Easy to adapt with different chocolate varieties or add-ins like nuts or espresso powder.
You’ll Also Love
If these Double Chocolate Rolls are hitting the spot, you might want to check out some of my other chocolate breakfast favorites:
Chocolate Chip Pancakes: Fluffy pancakes loaded with chocolate chips, perfect for weekend mornings.
Mocha Overnight Oats: For those mornings when you need chocolate and coffee in one bowl.
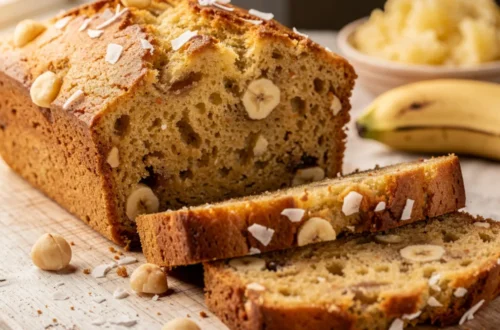
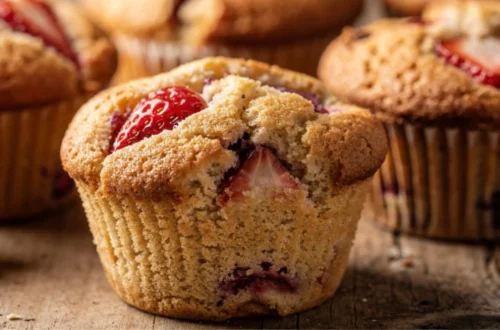
Triple Chocolate Muffins: The ultimate chocolate muffin with a crackly top and tender crumb.
Chocolate Babka: If you’re ready to level up your chocolate bread game.
Nutella Swirl Bread: Another yeasted chocolate bread that’s slightly easier than babka.
Conclusion
I’ll be honest, these Double Chocolate Rolls take a bit of time because of the rising periods, but the actual hands-on work is minimal. Most of the time is just waiting for the yeast to do its magic. And once you taste that first warm, chocolate-filled roll with the glaze dripping down, you’ll understand why this recipe has become a staple in my kitchen.
These rolls have gotten me through countless Sunday mornings, special occasion breakfasts, and moments when I just needed serious chocolate comfort. I hope they become one of your go-to recipes too. The first time you pull that pan out of the oven and see those perfect chocolate swirls, you’ll feel like a baking champion.
Try them this weekend. Your kitchen will smell amazing, and you’ll have delicious proof that chocolate for breakfast is not only acceptable, but sometimes absolutely necessary.
Happy baking!
Double Chocolate Rolls
Soft, fluffy chocolate rolls with rich chocolate filling, chocolate chips, and chocolate glaze.
Ingredients
For the Dough
- 3 ½ cups all-purpose flour
- ¼ cup unsweetened cocoa powder
- ¼ cup granulated sugar
- 1 packet (2 ¼ tsp) instant yeast
- 1 tsp salt
- 1 cup whole milk, warmed (110°F)
- ¼ cup unsalted butter, melted
- 2 large eggs, room temperature
- 1 tsp vanilla extract
For the Chocolate Filling
- ⅓ cup unsalted butter, softened
- ½ cup packed brown sugar
- 3 tbsp unsweetened cocoa powder
- 1 cup semi-sweet chocolate chips
For the Chocolate Glaze
- 1 cup powdered sugar
- 3 tbsp unsweetened cocoa powder
- 3-4 tbsp whole milk
- ½ tsp vanilla extract
Instructions
- Prepare the dough Whisk together flour, cocoa powder, sugar, yeast, and salt in a large mixing bowl. Make a well in the center and pour in warm milk, melted butter, eggs, and vanilla. Mix until a shaggy dough forms, about 2-3 minutes with a mixer or 5-6 minutes by hand.
- Knead the dough Knead the dough on medium speed for 8 minutes in a stand mixer, or by hand on a floured surface for 8-10 minutes, until smooth and elastic. The dough should pull away from the sides of the bowl.
- First rise Place dough in a greased bowl, turning once to coat. Cover with a kitchen towel and let rise in a warm spot until doubled in size, about 60-75 minutes.
- Prepare the filling Mix softened butter, brown sugar, and cocoa powder in a small bowl until you get a spreadable paste. A food processor makes this easier, but a fork works fine.
- Roll and fill Punch down risen dough and roll into a 16×12 inch rectangle on a lightly floured surface. Spread chocolate filling evenly, leaving a half-inch border on one long side. Sprinkle chocolate chips over the filling. Roll tightly from the long side opposite the border. Pinch seam to seal.
- Cut the rolls Use dental floss or a sharp knife to cut the log into 12 equal pieces. Arrange in a greased 9×13 inch baking pan with space between each roll.
- Second rise Cover rolls and let rise until puffy, about 30-45 minutes. They should spring back slowly when poked.
- Bake Preheat oven to 350°F. Bake rolls for 25-30 minutes until set and a toothpick inserted in the center comes out mostly clean with some melted chocolate visible.
- Make glaze and finish Whisk together powdered sugar, cocoa powder, milk (start with 3 tbsp), and vanilla until smooth. Add more milk if needed for desired consistency. Drizzle generously over warm rolls.
Notes
Make-Ahead: Prepare rolls the night before. After cutting and placing in pan, cover tightly and refrigerate overnight. In the morning, let sit at room temperature for 30 minutes while oven preheats, then bake as directed.
Storage: Keep in airtight container or meal prep containers for up to 3 days at room temperature, or freeze for up to 3 months.
Pro Tip: Add 1 tablespoon brewed coffee to the chocolate glaze to intensify the chocolate flavor without making it taste like coffee.