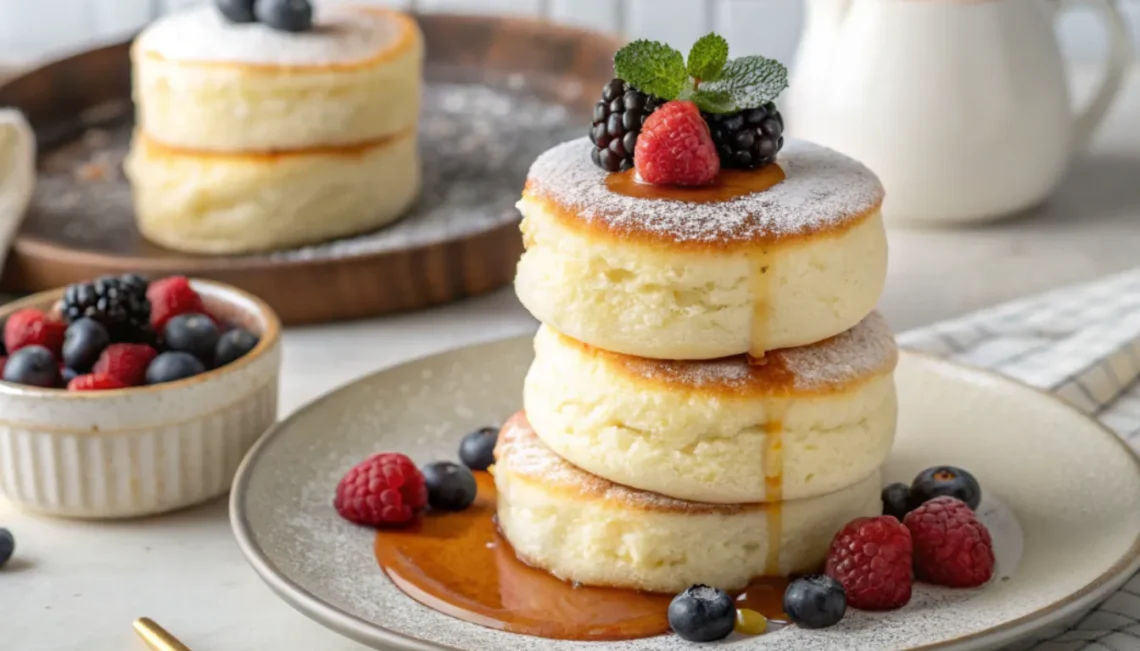
The first time I saw Japanese soufflé pancakes on Instagram, I thought they had to be fake. Those impossibly tall, jiggly stacks looked more like something out of a cartoon than actual food. But then I tried making them myself, and the first three attempts were disasters. Flat, deflated pancakes that looked nothing like the clouds I was going for. It took me weeks to figure out what I was doing wrong.
Here’s the thing about these pancakes. They’re not your typical Saturday morning breakfast where you dump everything in a bowl and call it a day. These require a bit of patience and technique, but the results are absolutely worth it. When you nail them, you get these incredibly fluffy, wobbly towers that practically melt in your mouth.
Essential Ingredients
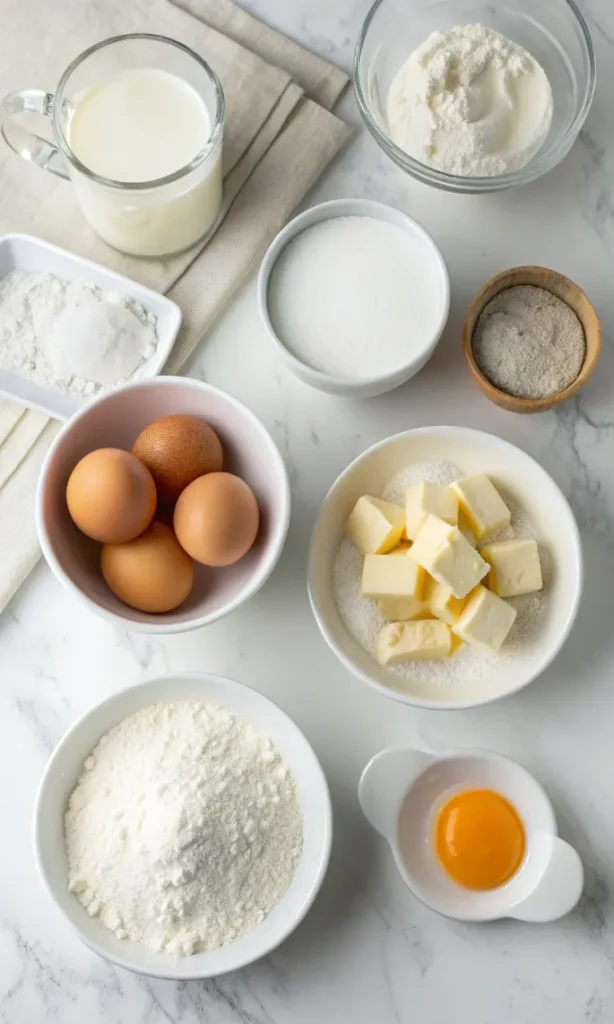
Let me break down what you actually need for this recipe. And before you panic, most of this stuff is probably already sitting in your kitchen:
- 2 large eggs (room temperature is crucial here)
- 2 tablespoons whole milk
- 1/4 teaspoon vanilla extract
- 1/4 cup all-purpose flour
- 1/2 teaspoon baking powder
- 2 tablespoons granulated sugar
- Pinch of salt
- Pinch of cream of tartar (this is your secret weapon)
- Butter for cooking
- Maple syrup and powdered sugar for serving
The room temperature eggs thing isn’t me being picky. Cold eggs just won’t whip up properly, and you’ll end up with dense pancakes instead of fluffy clouds. I learned this the hard way after wasting a dozen eggs trying to figure out why my meringue kept falling flat.
Alternative Ingredients
Look, I get it. Sometimes you don’t have cream of tartar lying around. You can substitute it with 1/4 teaspoon of lemon juice or white vinegar. It won’t be quite as stable, but it works in a pinch. I’ve also made these with cake flour instead of all-purpose, and they came out even more tender. But honestly? All-purpose works just fine, so don’t feel like you need to run to the store for specialty flour.
If you’re dairy-free, I’ve successfully used almond milk instead of regular milk. The texture is slightly different, but they still puff up beautifully.
Step-by-Step Directions
Alright, here’s where things get real. This isn’t hard, but you do need to pay attention.
Start by separating your eggs very carefully. Even a tiny bit of yolk in your whites will prevent them from whipping properly. I use the shell method, passing the yolk back and forth between shell halves.
In one bowl, whisk together your egg yolks, milk, and vanilla. Add the flour and baking powder, and mix until smooth. This is your base batter. Set it aside.
Now comes the fun part. In a completely clean bowl, add your egg whites and cream of tartar. Here’s where I have to mention my KitchenAid stand mixer, because trying to whip egg whites by hand for this recipe is brutal. I did it once and my arm hurt for two days. If you have a stand mixer, use it. An electric hand mixer works great too.
Beat those egg whites on medium speed until foamy, then gradually add your sugar, one tablespoon at a time. Keep beating until you get stiff, glossy peaks. This takes about 3-4 minutes. You’ll know they’re ready when you can turn the bowl upside down and nothing moves.
Here’s the critical step: folding the meringue into the batter. Add about a third of the meringue to your yolk mixture first and stir it in gently. This loosens up the base. Then add the rest of the meringue and fold it in carefully with a spatula, using a cutting and lifting motion. Keep as much air in there as possible.
Heat a non-stick pan over the lowest heat setting your stove has. And I mean lowest. These pancakes need gentle, slow cooking to puff up properly without burning. Add a tiny bit of butter to the pan.
Using a large spoon or ice cream scoop, dollop the batter onto the pan in tall mounds. Don’t spread it out. Just plop it down and let it be. Make them about 3-4 inches wide. Add a tiny bit more batter on top of each pancake to make them extra tall.
Cover the pan with a lid and cook for about 7 minutes. Don’t peek. After 7 minutes, carefully flip them using a wide spatula. Cover again and cook for another 5-6 minutes.
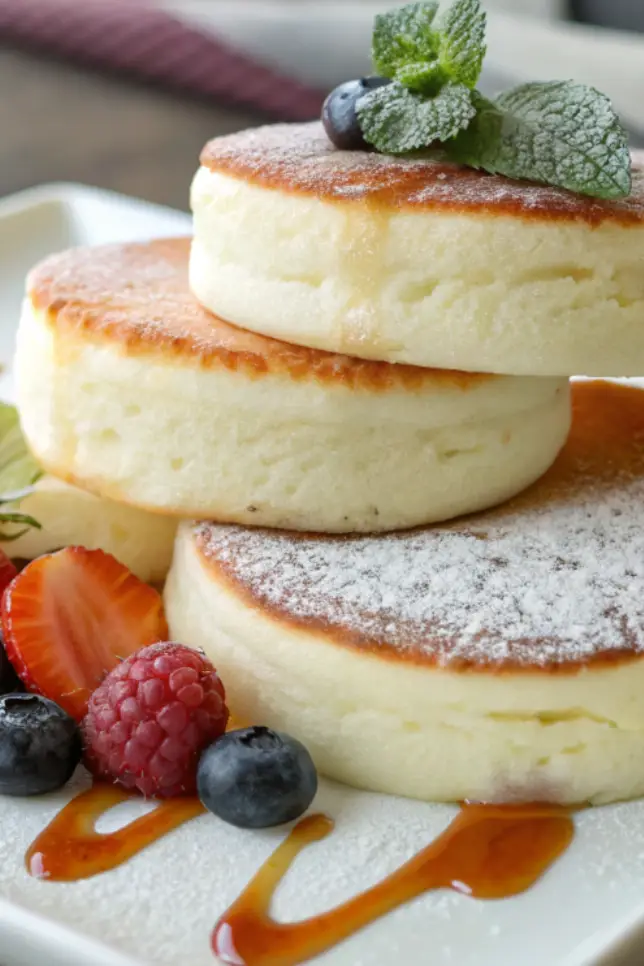
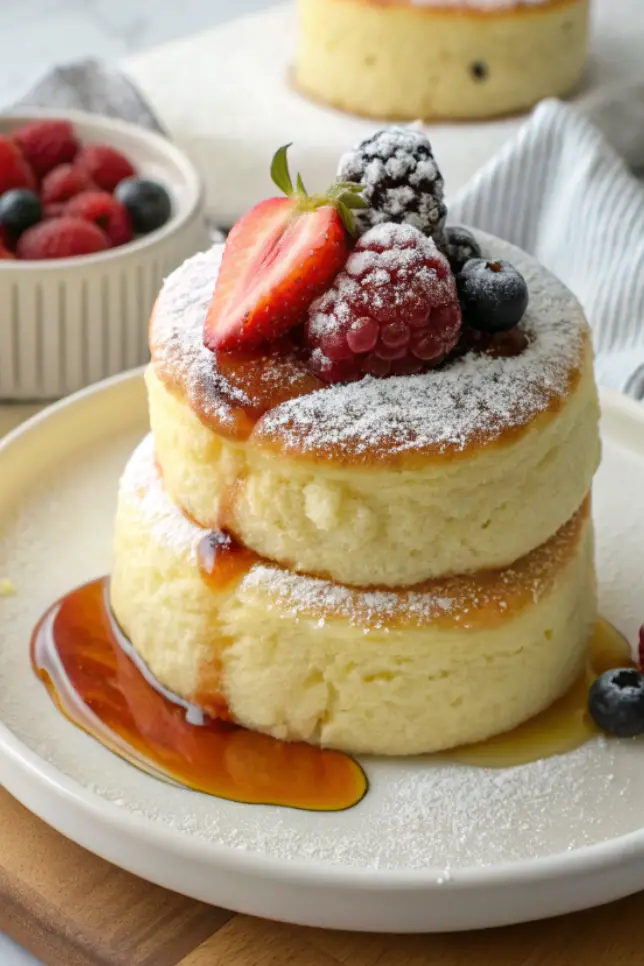
When you lift them off the pan, they should jiggle slightly. That’s what you want.
Pro Tips
After making these probably a hundred times, here are my hard-won tips:
Use the freshest eggs you can find. Older eggs don’t whip up as well. That low heat setting? I cannot stress this enough. My first attempts were on medium heat and they burned on the outside while staying raw inside.
If you want to make these for a crowd, keep finished pancakes warm in a 200°F oven while you cook the rest. Just don’t stack them or they’ll deflate.
A cast iron skillet gives me the most even heat distribution, but any good non-stick pan works fine. Just make sure it’s actually non-stick.
FAQs
Can I make the batter ahead of time? Nope. The meringue deflates quickly, so cook these right after mixing.
Why did my pancakes deflate? Usually your meringue wasn’t stiff enough, you overmixed when folding, or you cooked them too hot.
Can I freeze these? Technically yes, but they lose that signature fluffy texture when reheated.
Do they need to be served immediately? They’re best fresh, but they’ll hold for about 15-20 minutes before naturally deflating.
Recipe Info
| Prep Time | Cook Time | Total Time | Servings | Yield |
|---|---|---|---|---|
| 15 minutes | 15 minutes | 30 minutes | 2 | 4 large pancakes |
Why You’ll Love This Recipe
These pancakes are a total show-stopper. When you serve these at brunch, people lose their minds. I’ve had friends literally take photos before eating them (which, fair, they’re Instagram gold). But beyond the visual appeal, they’re genuinely delicious. The texture is unlike anything else.
They’re also surprisingly satisfying. Two of these pancakes and I’m good until lunch.
What Makes This Recipe Unique
Most Japanese soufflé pancake recipes are unnecessarily complicated or require special molds and equipment. This version? All you need is a good pan and a mixer. I’ve stripped it down to the essentials after years of testing.
The cream of tartar addition is my secret weapon. A lot of recipes skip it, but it stabilizes the meringue and gives you way more working time. I discovered this by accident when I was making meringue cookies and wondered if it would work for pancakes too. Spoiler: it does.
Key Features
Light and Fluffy Texture: These pancakes are about 75% air, which is exactly what you want. They should wobble when you plate them.
Simple Ingredients: No weird stuff you need to order online. Just eggs, flour, and pantry staples.
Impressive Presentation: They look like you went to culinary school, but really you just need patience and low heat.
Customizable: Top them with whatever you want. I’ve done fresh berries, whipped cream, chocolate sauce, even savory versions with cheese and herbs.
Nutrition Facts
| Nutrient | Per Serving (2 pancakes) |
|---|---|
| Calories | 165 |
| Protein | 7g |
| Carbohydrates | 22g |
| Fat | 5g |
| Sugar | 13g |
| Fiber | 0.5g |
These numbers are approximate and don’t include toppings. If you go crazy with the maple syrup like my husband does, well, all bets are off.
You’ll Also Love
If you’re into these fluffy Japanese pancakes, you need to try my Dutch Baby Pancake recipe. It’s got that same impressive puff factor but bakes in the oven instead. Way less stressful.
I’ve also got a killer recipe for Korean Street Toast that’s perfect for breakfast meal prep if you’re looking to switch things up during the week. You can make a batch on Sunday and store them in meal prep containers in the fridge.
And if you’re really into Japanese breakfast foods, my Tamagoyaki (Japanese Rolled Omelette) is another crowd-pleaser that uses a lot of the same techniques with eggs.
Conclusion
Look, I’m not going to lie. Your first batch of these might not be perfect. Mine certainly wasn’t. But that’s okay. Each time you make them, you’ll get better at judging when the meringue is just right, how hot your pan should be, when to flip them.
The key is not to get discouraged. I went through so many eggs before I got the technique down. But now? I can whip these up on a lazy Sunday morning without even thinking about it.
Start with low heat, be gentle with your meringue, and don’t rush the cooking process. You’ve got this. And when you nail it, these gorgeous pancakes are absolutely worth the effort.