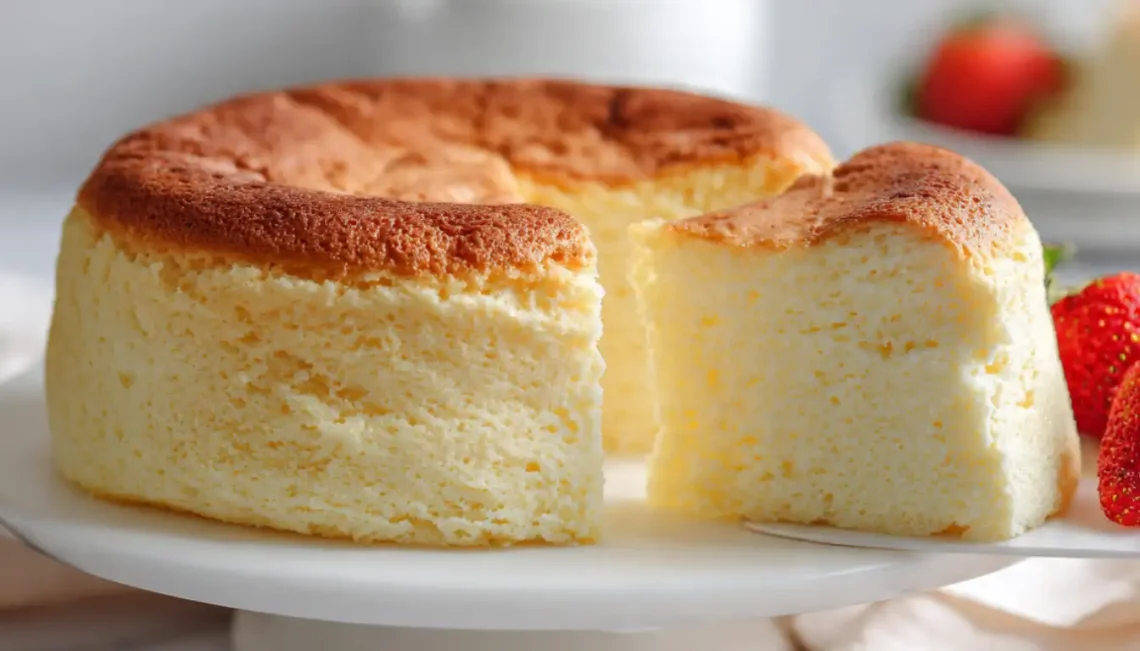
The first time I pulled a perfect Japanese cheesecake from my oven, I legitimately gasped. After three collapsed attempts and way too many egg whites whisked by hand (before I invested in my KitchenAid stand mixer), I finally understood why this cotton-soft dessert has millions of views across TikTok and Instagram.
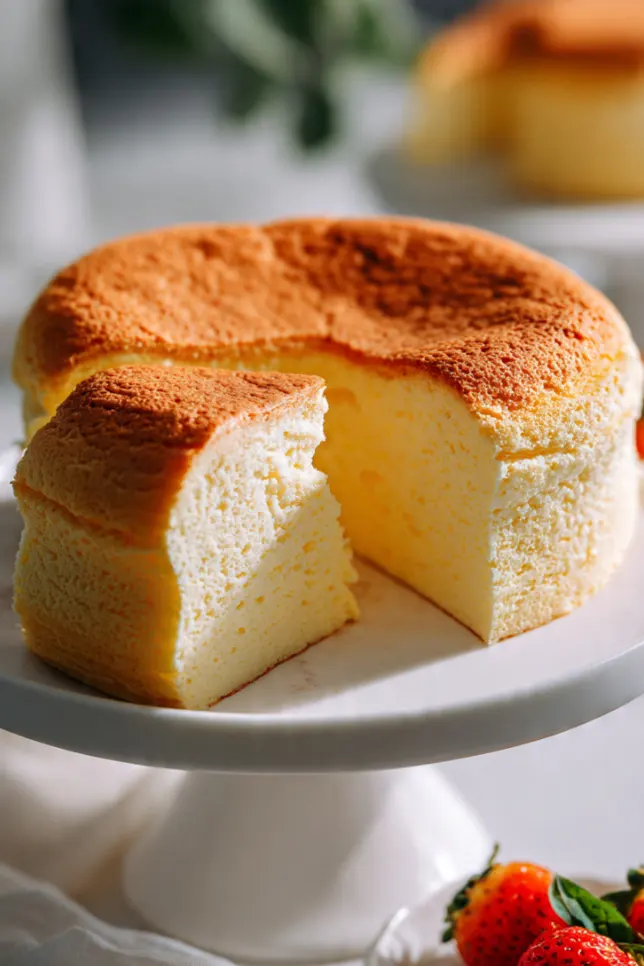
Here’s the thing about Japanese cheesecake. It’s not your typical New York-style brick of cream cheese. The Japanese call it “soufflé cheesecake,” and that name makes perfect sense when you see how it puffs up in the oven and settles into this impossibly soft, jiggly cake that bounces back when you tap it.
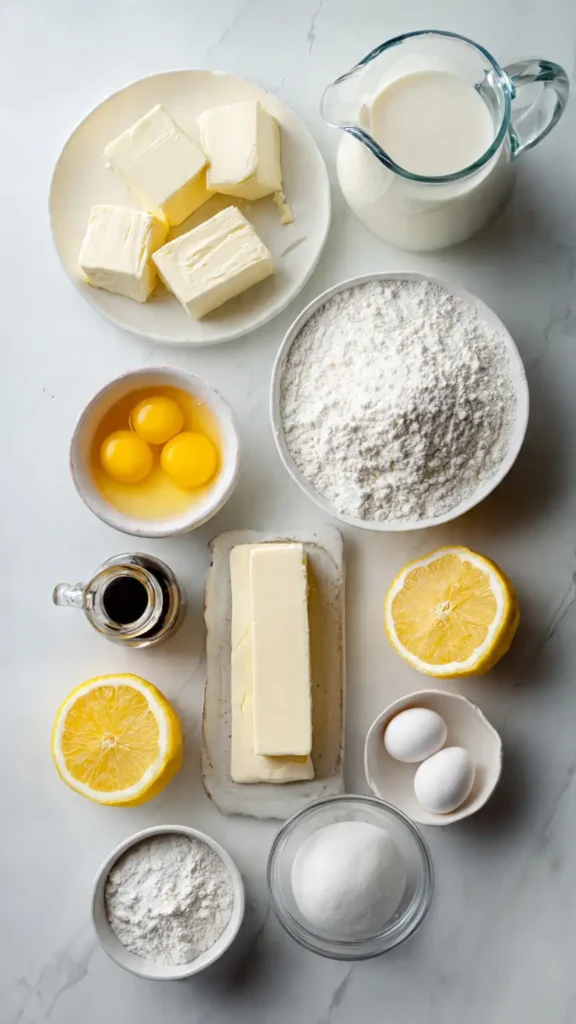
Essential Ingredients
- 8 oz (226g) cream cheese, softened to room temperature
- 1/4 cup (60ml) whole milk
- 1/4 cup (56g) unsalted butter
- 6 large eggs, separated
- 1/2 cup (100g) granulated sugar, divided
- 1/4 cup (30g) cake flour
- 2 tablespoons (16g) cornstarch
- 1/4 teaspoon cream of tartar
- 1 teaspoon vanilla extract
- 1/4 teaspoon salt
- 1 tablespoon lemon juice
Alternative Ingredients
Can’t find cake flour? Just take regular all-purpose flour, remove 2 tablespoons per cup, and replace it with cornstarch. Sift it three times.
If cream of tartar isn’t in your pantry, substitute with 1/2 teaspoon of lemon juice or white vinegar. The acid helps stabilize those egg whites.
Room temperature cream cheese is non-negotiable, but if you forgot to take it out, cut it into small cubes and microwave in 10-second bursts. Just don’t let it get melty.
Step-by-Step Directions
Prep Your Pan: Line an 8-inch round springform pan with parchment paper on the bottom and sides. This is crucial because the cake is delicate and you’ll need that barrier. Wrap the outside of the pan with aluminum foil to prevent water from seeping in during the water bath.
Mix the Base: In a double boiler (or a heatproof bowl over simmering water), combine cream cheese, milk, and butter. Stir constantly until everything melts together into a smooth mixture. This takes about 5 minutes. Remove from heat and let it cool for 10 minutes.
Add the Yolks: Whisk egg yolks into the cream cheese mixture one at a time. Then add vanilla, lemon juice, and salt. Sift in the cake flour and cornstarch, folding gently until just combined. Don’t overmix here or you’ll develop too much gluten.
Beat Those Whites: This is where a stand mixer really shines, though I did this with a hand mixer for years. Beat egg whites on medium speed until foamy. Add cream of tartar, then gradually add the remaining sugar while beating. Increase to high speed and beat until stiff peaks form. The meringue should be glossy and hold its shape when you lift the beaters.
Fold Carefully: Take a third of the meringue and fold it into the cream cheese mixture to lighten it. Then gently fold in the remaining meringue in two additions. Use a rubber spatula and fold from the bottom up, turning the bowl as you go. This step determines whether your cake rises beautifully or falls flat.
Water Bath Setup: Place your prepared pan in a larger roasting pan. Pour the batter into the springform pan and smooth the top. Fill the roasting pan with hot water until it comes about halfway up the sides of the springform pan.
Bake Low and Slow: Bake at 320°F (160°C) for 70-75 minutes. The top should be golden and spring back lightly when touched. Don’t open the oven door during baking or you risk collapse.
Cool Gradually: Turn off the oven and crack the door open slightly. Let the cake cool inside the oven for 30 minutes. This prevents the dramatic temperature change that causes cracks and sinking. Then remove and cool completely at room temperature.
Pro Tips
The water bath is everything. The steam keeps the cake moist and helps it rise evenly. If you’re worried about water leaking despite the foil, place the springform inside a slightly larger cake pan.
Room temperature ingredients make or break this recipe. Cold eggs won’t whip properly, and cold cream cheese creates lumps. Set everything out 2 hours before baking.
Don’t skip the parchment paper on the sides. This cake shrinks as it cools, and the paper barrier prevents sticking and tearing.
If using a convection oven, reduce temperature by 25°F to prevent uneven rising and cracks.
FAQs
Why did my Japanese cheesecake collapse? Usually it’s because the oven door was opened during baking, the cooling was too rapid, or the meringue wasn’t beaten to stiff peaks. The cake needs gradual temperature changes.
Can I make this without a water bath? Technically yes, but your texture will be drier and you’ll almost certainly get cracks on top. The water bath is what gives this cake its signature moist, custardy texture.
How do I store Japanese cheesecake? Keep it covered in the fridge for up to 5 days. It actually tastes amazing cold, almost like a chilled mousse. You can also freeze slices wrapped tightly in plastic wrap for up to 2 months.
Can I use a different pan size? An 8-inch pan is ideal, but a 9-inch works if you reduce the baking time by about 10 minutes. Smaller pans need more time, larger pans need less.
Why is my cake wrinkled on top? That’s actually normal and part of the charm. As the cake cools and deflates slightly, the top gets those characteristic wrinkles. It’s not a flaw.
Recipe Info
| Detail | Information |
|---|---|
| Prep Time | 30 minutes |
| Cook Time | 75 minutes |
| Cooling Time | 60 minutes |
| Total Time | 2 hours 45 minutes |
| Servings | 8 slices |
| Yield | One 8-inch cake |
Why You’ll Love This Recipe
This isn’t your average cheesecake. It’s lighter than air but still rich enough to satisfy dessert cravings. The texture is somewhere between a soufflé, a sponge cake, and traditional cheesecake.
It’s surprisingly not-too-sweet. Unlike American cheesecakes, Japanese cheesecake has delicate sweetness that lets the cream cheese flavor shine through.
The jiggly factor makes it incredibly Instagram-worthy. Every person who sees this cake wants to poke it and watch it wobble.
What Makes This Recipe Unique
Most Japanese cheesecake recipes online are either too complicated or miss crucial details. I’ve streamlined this after dozens of attempts and included all the tips that recipe developers usually leave out.
The lemon juice brightens the flavor and cuts through the cream cheese richness. The gradual cooling method prevents the dramatic sinking that plagues many home bakers. That 30-minute oven cooldown keeps your cake tall.
Key Features
Cotton-Soft Texture: The meringue creates thousands of tiny air bubbles for incredible lightness.
Minimal Ingredients: Just basic baking staples, nothing exotic.
Make-Ahead Friendly: Improves after a day in the fridge as flavors meld.
Versatile Serving: Works plain, with berries, whipped cream, or powdered sugar.
Nutrition Facts
| Per Slice (1/8 of cake) | Amount |
|---|---|
| Calories | 215 |
| Total Fat | 15g |
| Saturated Fat | 9g |
| Cholesterol | 165mg |
| Sodium | 180mg |
| Total Carbohydrates | 14g |
| Sugars | 12g |
| Protein | 6g |
Note: Nutritional values are approximate and will vary based on specific ingredients used.
You’ll Also Love
If this Japanese cheesecake wins you over, try my Basque Burnt Cheesecake for another trendy take on the classic. The caramelized top and creamy center are addictive.
My Classic New York Cheesecake is the dense, rich opposite of this fluffy cloud, perfect when you want something more substantial.
For another jiggly Japanese dessert, check out my Coffee Jelly recipe. It’s refreshing, easy, and has that same satisfying wobble factor.
Conclusion
Japanese cheesecake might seem intimidating with all the folding and water baths, but it’s worth the effort. Once you nail the technique, this becomes a show-stopping dessert you’ll make again and again.
In a world of heavy, overly sweet desserts, this light-as-air cake feels refreshing. Plus, there’s something deeply satisfying about creating something this beautiful in your own kitchen with a stand mixer and a little patience.
Give it a try this weekend. Your Instagram followers will thank you.