If you’re craving a dessert that’s both indulgent and visually stunning, these Easy Red Velvet Brownies are just what you need. Combining the rich cocoa flavor of a classic brownie with the soft, velvety texture of red velvet cake, this recipe delivers a treat that’s chewy, fudgy, and downright irresistible.
These brownies aren’t just delicious—they’re also incredibly simple to make, perfect for both beginner bakers and seasoned pros. The vibrant red color makes them an eye-catching dessert for special occasions like Valentine’s Day, Christmas, or even birthdays. Plus, with their rich cocoa taste and gooey texture, they’re bound to impress at any gathering.
In this post, you’ll discover everything you need to create the perfect batch—from essential ingredients like cocoa powder, cream cheese, and buttermilk to expert baking tips that guarantee success every time. Get ready to whip up a dessert that’s as easy to make as it is delightful to eat!
Why You’ll Love These Red Velvet Brownies

These red velvet brownies aren’t just your average dessert—they’re a luxurious fusion of rich chocolate flavor, vibrant color, and a chewy, fudgy texture that’s hard to resist. Whether you’re baking for a special celebration, looking to satisfy a sweet craving, or just want an easy homemade treat, this recipe checks all the boxes. Here’s why these brownies will quickly become a go-to in your baking repertoire:
Perfect Texture – Fudgy, Chewy, and Moist
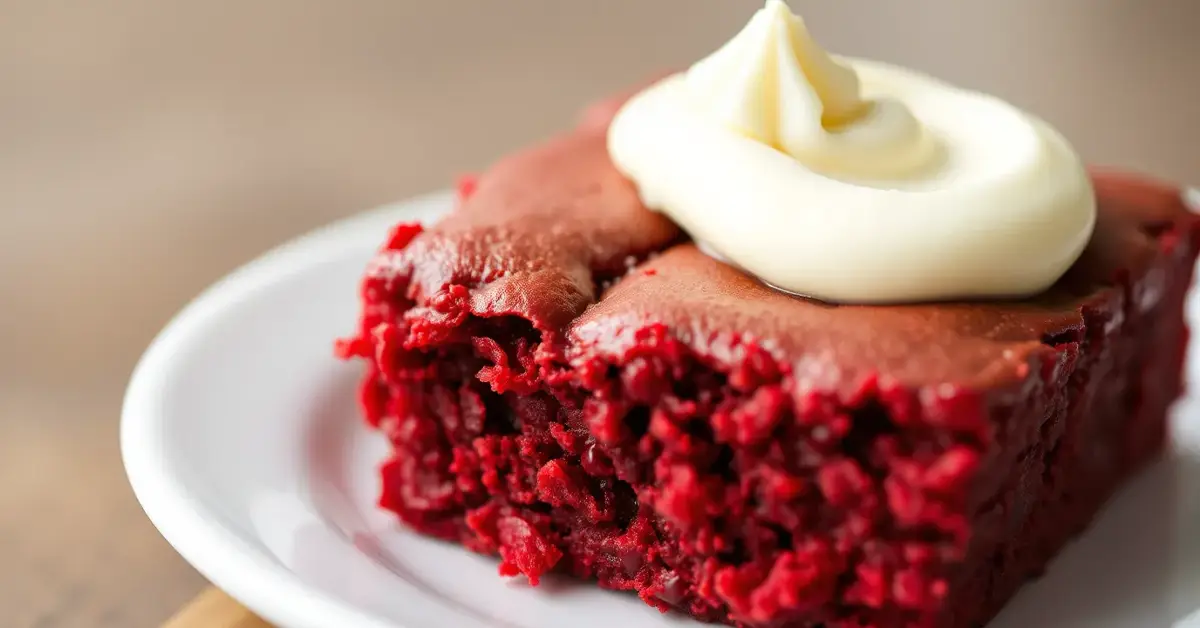
The hallmark of any good brownie is its texture, and these red velvet brownies deliver on all fronts. They’re delightfully fudgy in the center, with just the right amount of chewiness on the edges—ideal for anyone who loves a soft, gooey bite with a slightly crisp crust.
The secret lies in the perfect balance of ingredients. The combination of cocoa powder and buttermilk creates a dense yet tender crumb, while a generous amount of butter adds richness and moisture. Every bite melts in your mouth, offering a decadent chocolate flavor with a hint of tangy goodness that’s signature to red velvet.
Ideal for Any Occasion
One of the best things about these red velvet brownies is their versatility. The bold red color and indulgent texture make them a standout treat for special events and everyday moments alike.
- Holidays and Celebrations: Their festive red hue makes these brownies perfect for Valentine’s Day, Christmas, or even Fourth of July when paired with a touch of white frosting or blue sprinkles.
- Birthday Parties and Gatherings: Serve them at birthdays, bridal showers, or baby showers as a unique dessert option that’s sure to impress guests.
- Casual Treats: They’re just as perfect for a cozy night in, paired with a hot cup of coffee or tea.
No matter the occasion, these brownies offer a delightful twist on the classic chocolate brownie—adding elegance and a pop of color to any dessert table.
Essential Ingredients for the Perfect Red Velvet Brownies

Creating the perfect batch of red velvet brownies starts with the right ingredients. Each component in this recipe plays a vital role in achieving that signature rich flavor, chewy texture, and iconic red hue. By understanding what each ingredient does, you’ll be able to bake brownies that are irresistibly fudgy, moist, and packed with flavor every time.
Key Ingredients Breakdown
Here’s a closer look at the essential ingredients that make these red velvet brownies so delectable:
- All-Purpose Flour: This forms the base of your brownie batter, providing structure and ensuring your brownies hold together while remaining soft and chewy.
- Cocoa Powder: The key to achieving that subtle chocolate flavor characteristic of red velvet. A small amount adds richness without overpowering the classic red velvet tang. For best results, use unsweetened cocoa powder for a deep, authentic cocoa taste.
- Granulated Sugar: This sweetens the brownies while also helping create a soft, moist texture. Sugar also contributes to the crackly, shiny top layer that brownie lovers adore.
- Butter: Melted butter brings richness and moisture, enhancing the fudgy consistency of the brownies. Using unsalted butter allows you to control the salt levels in the recipe.
- Buttermilk: Buttermilk adds the signature tang that sets red velvet apart from traditional chocolate brownies. It also reacts with baking soda to create a tender, airy texture.
- Red Food Coloring: No red velvet dessert is complete without that vibrant, eye-catching color. A few drops of liquid or gel food coloring give these brownies their classic deep red hue.
- Eggs: Eggs provide structure and help bind all the ingredients together, contributing to the chewy, fudgy texture. Room-temperature eggs mix more evenly and help create a smooth batter.
- Vanilla Extract: A splash of vanilla adds warmth and enhances the overall flavor of the brownies, balancing out the cocoa and tangy buttermilk notes.
- White Vinegar: A traditional ingredient in red velvet recipes, vinegar works with the baking soda to create a soft, tender crumb while enhancing the red color’s brightness.
- Salt: Just a pinch helps balance the sweetness and intensifies the flavors of cocoa and vanilla.
Substitutions and Variations
One of the best things about this red velvet brownie recipe is how customizable it can be. Here are some easy substitutions and creative variations to suit your preferences or dietary needs:
- Dairy-Free Alternative: Swap out the butter for a plant-based substitute and use non-dairy milk mixed with a splash of lemon juice in place of buttermilk for a dairy-free version.
- Chocolate Chips: For an extra indulgent touch, fold in white chocolate or dark chocolate chips to add bursts of melted chocolate in every bite.
- Cream Cheese Swirl: Want to add a classic red velvet pairing? Drop spoonfuls of sweetened cream cheese mixture on top of the batter and swirl it in for a rich, tangy twist.
- Natural Food Coloring: If you prefer to avoid artificial dyes, opt for natural food coloring made from beetroot powder or pomegranate juice—this offers a beautiful red shade without additives.
- Gluten-Free Option: Replace regular flour with a gluten-free all-purpose blend to make these brownies suitable for those with gluten sensitivities.
With these high-quality ingredients and creative variations, your red velvet brownies will turn out rich, chewy, and picture-perfect every single time.
Step-by-Step Guide to Making Red Velvet Brownies

Baking the perfect batch of red velvet brownies doesn’t have to be complicated. With the right technique and a little patience, you’ll achieve a rich, chewy, and indulgent dessert that’s sure to impress. This step-by-step guide will walk you through every stage of the process, from preparation to baking, ensuring your brownies turn out perfectly every time.
Preparation Tips for Best Results
Before diving into the mixing and baking process, a few preparation steps can set you up for success. These tips ensure your ingredients come together smoothly, and your brownies bake evenly with that irresistible fudgy texture.
- Preheat Your Oven:
- Set your oven to 350°F (175°C). Allowing your oven to fully preheat ensures an even baking temperature, which is essential for achieving the perfect chewy texture.
- Prepare Your Baking Pan:
- Line an 8×8-inch square baking pan with parchment paper or lightly grease it with butter or non-stick spray. This helps prevent sticking and makes it easier to lift the brownies out after baking.
- Use Room Temperature Ingredients:
- Allow ingredients like eggs, buttermilk, and butter to come to room temperature before using. This helps them blend more easily, creating a smooth batter and even texture.
- Measure Accurately:
- Use measuring cups for dry ingredients and a kitchen scale for the most accurate results. Precise measurements help maintain the perfect balance between the fudgy and cakey textures.
- Sift Your Dry Ingredients:
- Sifting the flour, cocoa powder, and salt removes any lumps and ensures the dry ingredients combine smoothly with the wet ingredients, resulting in a tender crumb.
Baking Instructions
Once your ingredients are ready and your oven is preheated, follow these simple steps to create rich, chewy, and beautifully red velvet brownies:
- Melt the Butter and Mix with Sugar:
- In a medium-sized bowl, melt unsalted butter and combine it with granulated sugar. Whisk until the mixture becomes smooth and slightly creamy. This step helps achieve that shiny, crackly top layer.
- Add Eggs and Vanilla:
- Crack in the eggs one at a time, whisking well after each addition. Then, stir in the vanilla extract. This creates a rich and flavorful base for your brownies.
- Incorporate Red Food Coloring:
- Add the desired amount of red food coloring to the mixture and stir until you achieve a vibrant red hue. For a deeper color, you can use gel food coloring, which tends to be more concentrated.
- Mix in the Dry Ingredients:
- Gradually sift in the flour, cocoa powder, and salt, folding the dry ingredients into the wet mixture with a spatula. Be careful not to overmix—this can lead to tough brownies.
- Add Buttermilk and Vinegar:
- Stir in the buttermilk and white vinegar. These ingredients enhance the rich red velvet flavor and ensure a moist, tender texture.
- Pour Batter into Pan:
- Spread the batter evenly into your prepared baking pan. Use a spatula to smooth the top for even baking.
- Bake the Brownies:
- Place the pan in the oven and bake for 25–30 minutes, or until a toothpick inserted into the center comes out with just a few moist crumbs. Avoid overbaking to maintain that chewy, fudgy consistency.
- Cool Before Slicing:
- Let the brownies cool completely in the pan before cutting. This allows them to set properly and ensures clean, even slices.
- Optional Topping – Cream Cheese Frosting:
- For an extra indulgent touch, spread a layer of cream cheese frosting on top once the brownies have cooled. This classic pairing enhances the red velvet flavor and adds creamy richness.
With this step-by-step guide, you’ll master the art of baking red velvet brownies that are rich, chewy, and irresistibly delicious. Ready to take your baking skills to the next level? Up next, let’s dive into some expert tips and answer common questions to guarantee perfect results every time.
Expert Tips and FAQs for Red Velvet Brownies
To ensure your red velvet brownies turn out perfectly chewy, fudgy, and rich every time, it’s essential to know a few expert tricks and understand some of the most common baking questions. Whether you’re a beginner or an experienced baker, these insights will help you avoid common pitfalls and elevate your baking game.
Expert Tips for Perfect Red Velvet Brownies
- Don’t Overmix the Batter
- Overmixing your brownie batter can lead to tough, dry brownies. Once you add the dry ingredients, gently fold them in until just combined. This helps maintain that soft, chewy texture that makes brownies so irresistible.
- Overmixing your brownie batter can lead to tough, dry brownies. Once you add the dry ingredients, gently fold them in until just combined. This helps maintain that soft, chewy texture that makes brownies so irresistible.
- Use Quality Cocoa Powder
- A good-quality unsweetened cocoa powder makes all the difference in the flavor of your brownies. Opt for a high-quality brand for a richer, more indulgent chocolate taste that complements the classic red velvet tang.
- A good-quality unsweetened cocoa powder makes all the difference in the flavor of your brownies. Opt for a high-quality brand for a richer, more indulgent chocolate taste that complements the classic red velvet tang.
- Measure Flour Correctly
- Adding too much flour can make your brownies dry and cakey. Spoon the flour into your measuring cup and level it off with a knife instead of scooping directly from the bag, which can lead to using more flour than needed.
- Adding too much flour can make your brownies dry and cakey. Spoon the flour into your measuring cup and level it off with a knife instead of scooping directly from the bag, which can lead to using more flour than needed.
- Achieve the Perfect Red Hue
- For that iconic red velvet look, use gel food coloring instead of liquid. Gel food coloring is more concentrated, providing a vibrant red color without adding extra liquid to your batter.
- For that iconic red velvet look, use gel food coloring instead of liquid. Gel food coloring is more concentrated, providing a vibrant red color without adding extra liquid to your batter.
- Test for Doneness Early
- Start checking your brownies a few minutes before the recommended baking time. Insert a toothpick into the center—if it comes out with a few moist crumbs (but not wet batter), your brownies are done. Overbaking will result in a dry texture.
- Start checking your brownies a few minutes before the recommended baking time. Insert a toothpick into the center—if it comes out with a few moist crumbs (but not wet batter), your brownies are done. Overbaking will result in a dry texture.
- Let the Brownies Cool Completely
- It’s tempting to cut into your brownies right away, but letting them cool in the pan helps them set properly. For clean slices, use a sharp knife and wipe it between cuts for a polished finish.
- It’s tempting to cut into your brownies right away, but letting them cool in the pan helps them set properly. For clean slices, use a sharp knife and wipe it between cuts for a polished finish.
- Enhance with Toppings
- Take your red velvet brownies to the next level by adding toppings like cream cheese frosting, a drizzle of melted white chocolate, or a dusting of powdered sugar. These additions elevate both flavor and presentation.
Frequently Asked Questions (FAQs)
Can I make red velvet brownies without food coloring?
Yes! While the vibrant red hue is a signature of red velvet, you can skip the food coloring if you prefer a natural look. Alternatively, try using natural food dyes like beetroot powder or pomegranate juice for a subtle red tint without artificial additives.
How do I store red velvet brownies?
Store your brownies in an airtight container at room temperature for up to 4 days. If you’ve topped them with cream cheese frosting, refrigerate them and consume within 5 days for the best freshness and texture.
Can red velvet brownies be frozen?
Absolutely! Allow your brownies to cool completely, then wrap them tightly in plastic wrap and aluminum foil. Store them in the freezer for up to 3 months. Thaw at room temperature when you’re ready to enjoy them again.
What’s the difference between red velvet brownies and chocolate brownies?
The main difference lies in flavor and texture. While chocolate brownies are rich and intensely chocolaty, red velvet brownies have a more subtle cocoa flavor with a slight tang from buttermilk and vinegar. Plus, their vibrant red color and soft, chewy texture make them stand out.
Why did my red velvet brownies turn out dry?
Dry brownies are often the result of overbaking or adding too much flour. To avoid this, follow the baking time closely and check for doneness early. Also, measure your flour correctly by spooning and leveling it instead of scooping directly from the bag.
Can I make these brownies gluten-free?
Yes! Simply swap the all-purpose flour for a 1:1 gluten-free baking flour. The rest of the ingredients remain the same, and you’ll still get that rich, fudgy texture without the gluten.
Can I add mix-ins like nuts or chocolate chips?
Definitely! Stir in white chocolate chips, dark chocolate chunks, or chopped pecans for extra texture and flavor. These additions can elevate your brownies and add a delightful crunch or melty richness in every bite.
Conclusion
There’s something truly irresistible about a batch of red velvet brownies—the rich cocoa flavor, the soft, chewy texture, and that signature vibrant red hue make them a dessert that stands out on any table. Whether you’re baking for a special occasion, a holiday gathering, or simply craving something indulgent, this easy recipe guarantees delicious results every time.
With the expert tips, step-by-step guide, and answers to common questions provided in this post, you’re now ready to bake brownies that are not just visually stunning but also packed with flavor and perfectly fudgy in every bite.
So, what are you waiting for? Gather your ingredients, preheat your oven, and dive into the delightful world of red velvet brownies. Don’t forget to share your baking success in the comments below—I’d love to hear how they turned out for you!
Explore More Recipes: Visit Cucina Recipes to find even more delicious meal ideas to inspire your next cooking adventure!
Did you make this recipe?
Mention @cucinarecipes or tag #cucinarecipes!